Heyy people,
I've been sooo busy with school that I have nearly posted one time, but now I have a 5days break:)
This is one of my favorite patterns and I hope you like it and maybe give it a try;)
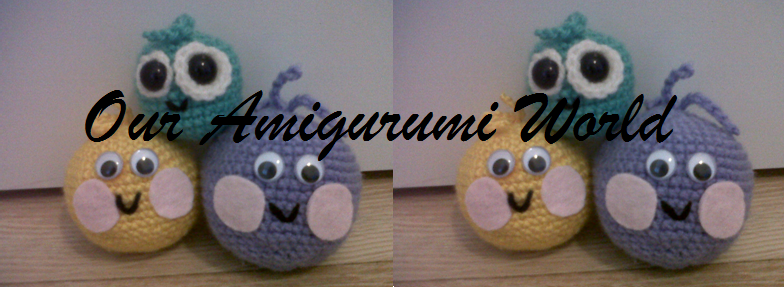
(The picture isn't really clear so I'll make a new one and post it soon)
Here is the pattern of this Amigurumi Girl
Head/Torso
Round 1 make an adjustable ring and work 5 sc in the ring
Round 2 [2 sc in each st] 5 times ----10 sts.
Round 3 [sc in next st, 2 sc in next st] 5 times -----15 sts.
Round 4 [sc in next 2 sts, 2 sc in next st] 5 times ----- 20 sts.
Round 5 [sc in next 3 sts, 2 sc in next st] 5 times ----- 25 sts.
Round 6 [sc in next 4 sts, 2 sc in next st] 5 times ----- 30 sts.
Round 7 [sc in next 5 sts, 2 sc in next st] 5 times ----- 35 sts.
Round 8 [sc in next 6 sts, 2 sc in next st] 5 times ----- 40 sts.
Rounds 9-16 sc in each st around ----- 40 sts.
Also, if you will be using the craft eyes, insert them in Round 14, 8 sts apart.
Round 17 [sc in next 6 sts, sc2tog] 5 times ----- 35 sts.
Round 18 [sc in next 5 sts, sc2tog] 5 times ----- 30 sts.
Round 19 [sc in next 4 sts, sc2tog] 5 times ----- 25 sts.
Round 20 [sc in next 3 sts, sc2tog] 5 times ----- 20 sts.
Stuff the head with wool as tightly as you can, it’ll become more narrow now and more difficult to stuff the longer you wait. Also embroider the mouth on with the pink floss making a fly stitch.
Round 21 [sc in next 2 sts, sc2tog] 5 times ----- 15 sts. Change color to white.
Round 22 in the inside loop only [sc in each st around] ----- 15 sts.
Round 23 [sc in next 4 sts, 2 sc in next st] 3 times ----- 18 sts.
Round 24 [sc in next 5 sts, 2 sc in next st] 3 times ----- 21 sts.
Round 25 sc in each st around ----- 21 sts.
Round 26 [sc in next 6 sts, 2 sc in next st] 3 times ----- 24 sts.
Round 27 in the inside loop only [sc in each st around] ----- 24 sts.
Rounds 28-31 sc in each st around ----- 24 sts.
Round 32 [sc in next 2 sts, sc2tog] 6 times ----- 18 sts. Stuff the body to capacity.
Round 33 [sc in next st, sc2tog] 6 times ----- 12 sts.
Round 34 [sc2tog] 6 times ----- 6 sts.
Fasten off and using the yarn and a yarn needle close up the hole by stitching back and forth across the little opening.
Skirt
These rounds of Double Crochet will be joined with a slip stitch at the end of each round before beginning the next one.
Round 1 join to the outer loops in Round 26 of the torso and slip stitch all the way around the body, completing the round with a final slip stitch into the first one of the round ---- 24 sts.
Round 2 chain 3 (to count as a dc), 2 dc in the next st [dc in next st, 2 dc in next st] 11 times ----- 36 sts.
Round 3 chain 3 (to count as a dc), and dc in each st around ----36 sts.
Round 4 chain 3 (to count as a dc), dc, 2 dc in the next st [dc in next 2 sts, 2 dc in next st] 11 times ----- 48 sts.
Round 5 chain 3 (to count as a dc), and dc in each st around ----48 sts. Fasten off and weave in remaining yarn.
Hair/Wig Cap
Reminder- do not join the rounds crocheting will be in a continuous spiral, the rounds will increase and decrease in increments of 5. The wig cap will be crocheted to fit around the head stopping right before you get to the point where you start decreasing.
Round 1 With black yarn, make an adjustable ring and work 5 sc in the ring, do not join, using the stitchmarker to mark the first stitch of the next round ---- 5sts.
Round 2 [2 sc in each st] 5 times ----10 sts.
Round 3 [sc in next st, 2 sc in next st] 5 times -----15 sts.
Round 4 [sc in next 2 sts, 2 sc in next st] 5 times ----- 20 sts.
Round 5 [sc in next 3 sts, 2 sc in next st] 5 times ----- 25 sts.
Round 6 [sc in next 4 sts, 2 sc in next st] 5 times ----- 30 sts.
Round 7 [sc in next 5 sts, 2 sc in next st] 5 times ----- 35 sts.
Round 8 [sc in next 6 sts, 2 sc in next st] 5 times ----- 40 sts.
Rounds 9-18 sc in each st around ----- 40 sts.
Fasten off and leave a 12 inch length of yarn to sew the wig to the head. Using a yarn needle, whipstitch around the edge of the wig and the head to have a hair colored base for the hair style. Cut a length of black yarn long enough to embroider hair. The bob shown was created by beginning at the side part and embroidering down to the hair length, making sure to alternate sides to ensure and even hairstyle. If you run out of yarn, or would like the hair to appear fuller, you can always cut more yarn, and then continue to work back and forth until you’re happy with the fullness of the hair.
Arms
Round 1 With a flesh colored yarn, make an adjustable ring and work 6 sc in the ring, do not join, using the stitch marker to mark the first stitch of the next round ---- 6 sts.
Round 2 [sc, 2 sc in the next st] 3 times ----9 sts.
Round 3 [sc2tog] 3 times, sc in the last 3 sts ----- 6 sts.
Change color to white.
Rounds 4-10 sc in each st around ----- 6 sts.
After completing round 10 fasten off each arm leaving a length of yarn to sew the arms to the body. Do not stuff the arms. Pinch each sleeve together and sew it closed, and then sew the arms to the body wherever you’d like them to be.
Legs
Round 1 With a red yarn, make an adjustable ring and work 7 sc in the ring, do not join, using the stitch marker to mark the first stitch of the next round ---- 7 sts.
Round 2 [2 sc in the next st] 3 times, sc in the last 4 sts ---- 10 sts.
Round 3 [2 sc in the next st] 2 times, [2 hdc in the next st] 2 times, [2 sc in the next st] 2 times, sc in the last 4 sts ----- 16 sts.
Round 4 sc in next 2 sts, [sc2tog] 4 times, sc in the last 6 sts ----- 12 sts. Change color to white.
Round 5 in the inside loop only- [sc2tog] 4 times, sc in the last 4 sts ----- 8 sts.
Rounds 6-12 sc in each st around ----- 8 sts.
Fasten off, leave a length to sew the legs to the body. After stuffing the feet and legs, pinch the top of each leg together and sew it closed with the remaining yarn and a yarn needle. Then, sew each leg to the underside of the doll’s torso to complete the doll!
Please tell us if you made it, because we'd love to see!!
Love, Sarah
 By the way, do you know those moments that you don't know what to crochet? For that moments, I made a inspiration notebook. Actually, I just started it, but that doesn't matter. It is just a notebook with in there drawings that people (my brother, mother, myself) made, for inspiration. There are also pictures in there and information for myself about crochet. Out of that book, the inspiration for the little monster came and for the penguin.